While doing tapestry type weavings with 4th grade, I have students use five colors within their "color story". After adding their five colors, they are allowed to add a "specialty string" into the mix. They are allowed to use it 3x within their weaving. I tell them if you use it more...it isn't really "special".
What is specialty string? I have a pretty big variety that I've obtained over the years. I found some of it at Dollar Tree & Big Lots for a very good price. I found some of it in the clearance section at craft stores. I Keep my eyes open for things that are fun/different, and that I think my students could successfully weave. Let me give you all a tip...DO NOT GET POM POM YARN!!!!! Imagine a bunch of little pom-poms going through the warp strings!! UGH! Trust me...it is a headache and totally not worth it. Here is a look at the top of my specialty string box, and some weaving examples from years past (we aren't to that point yet this year...just started them!).
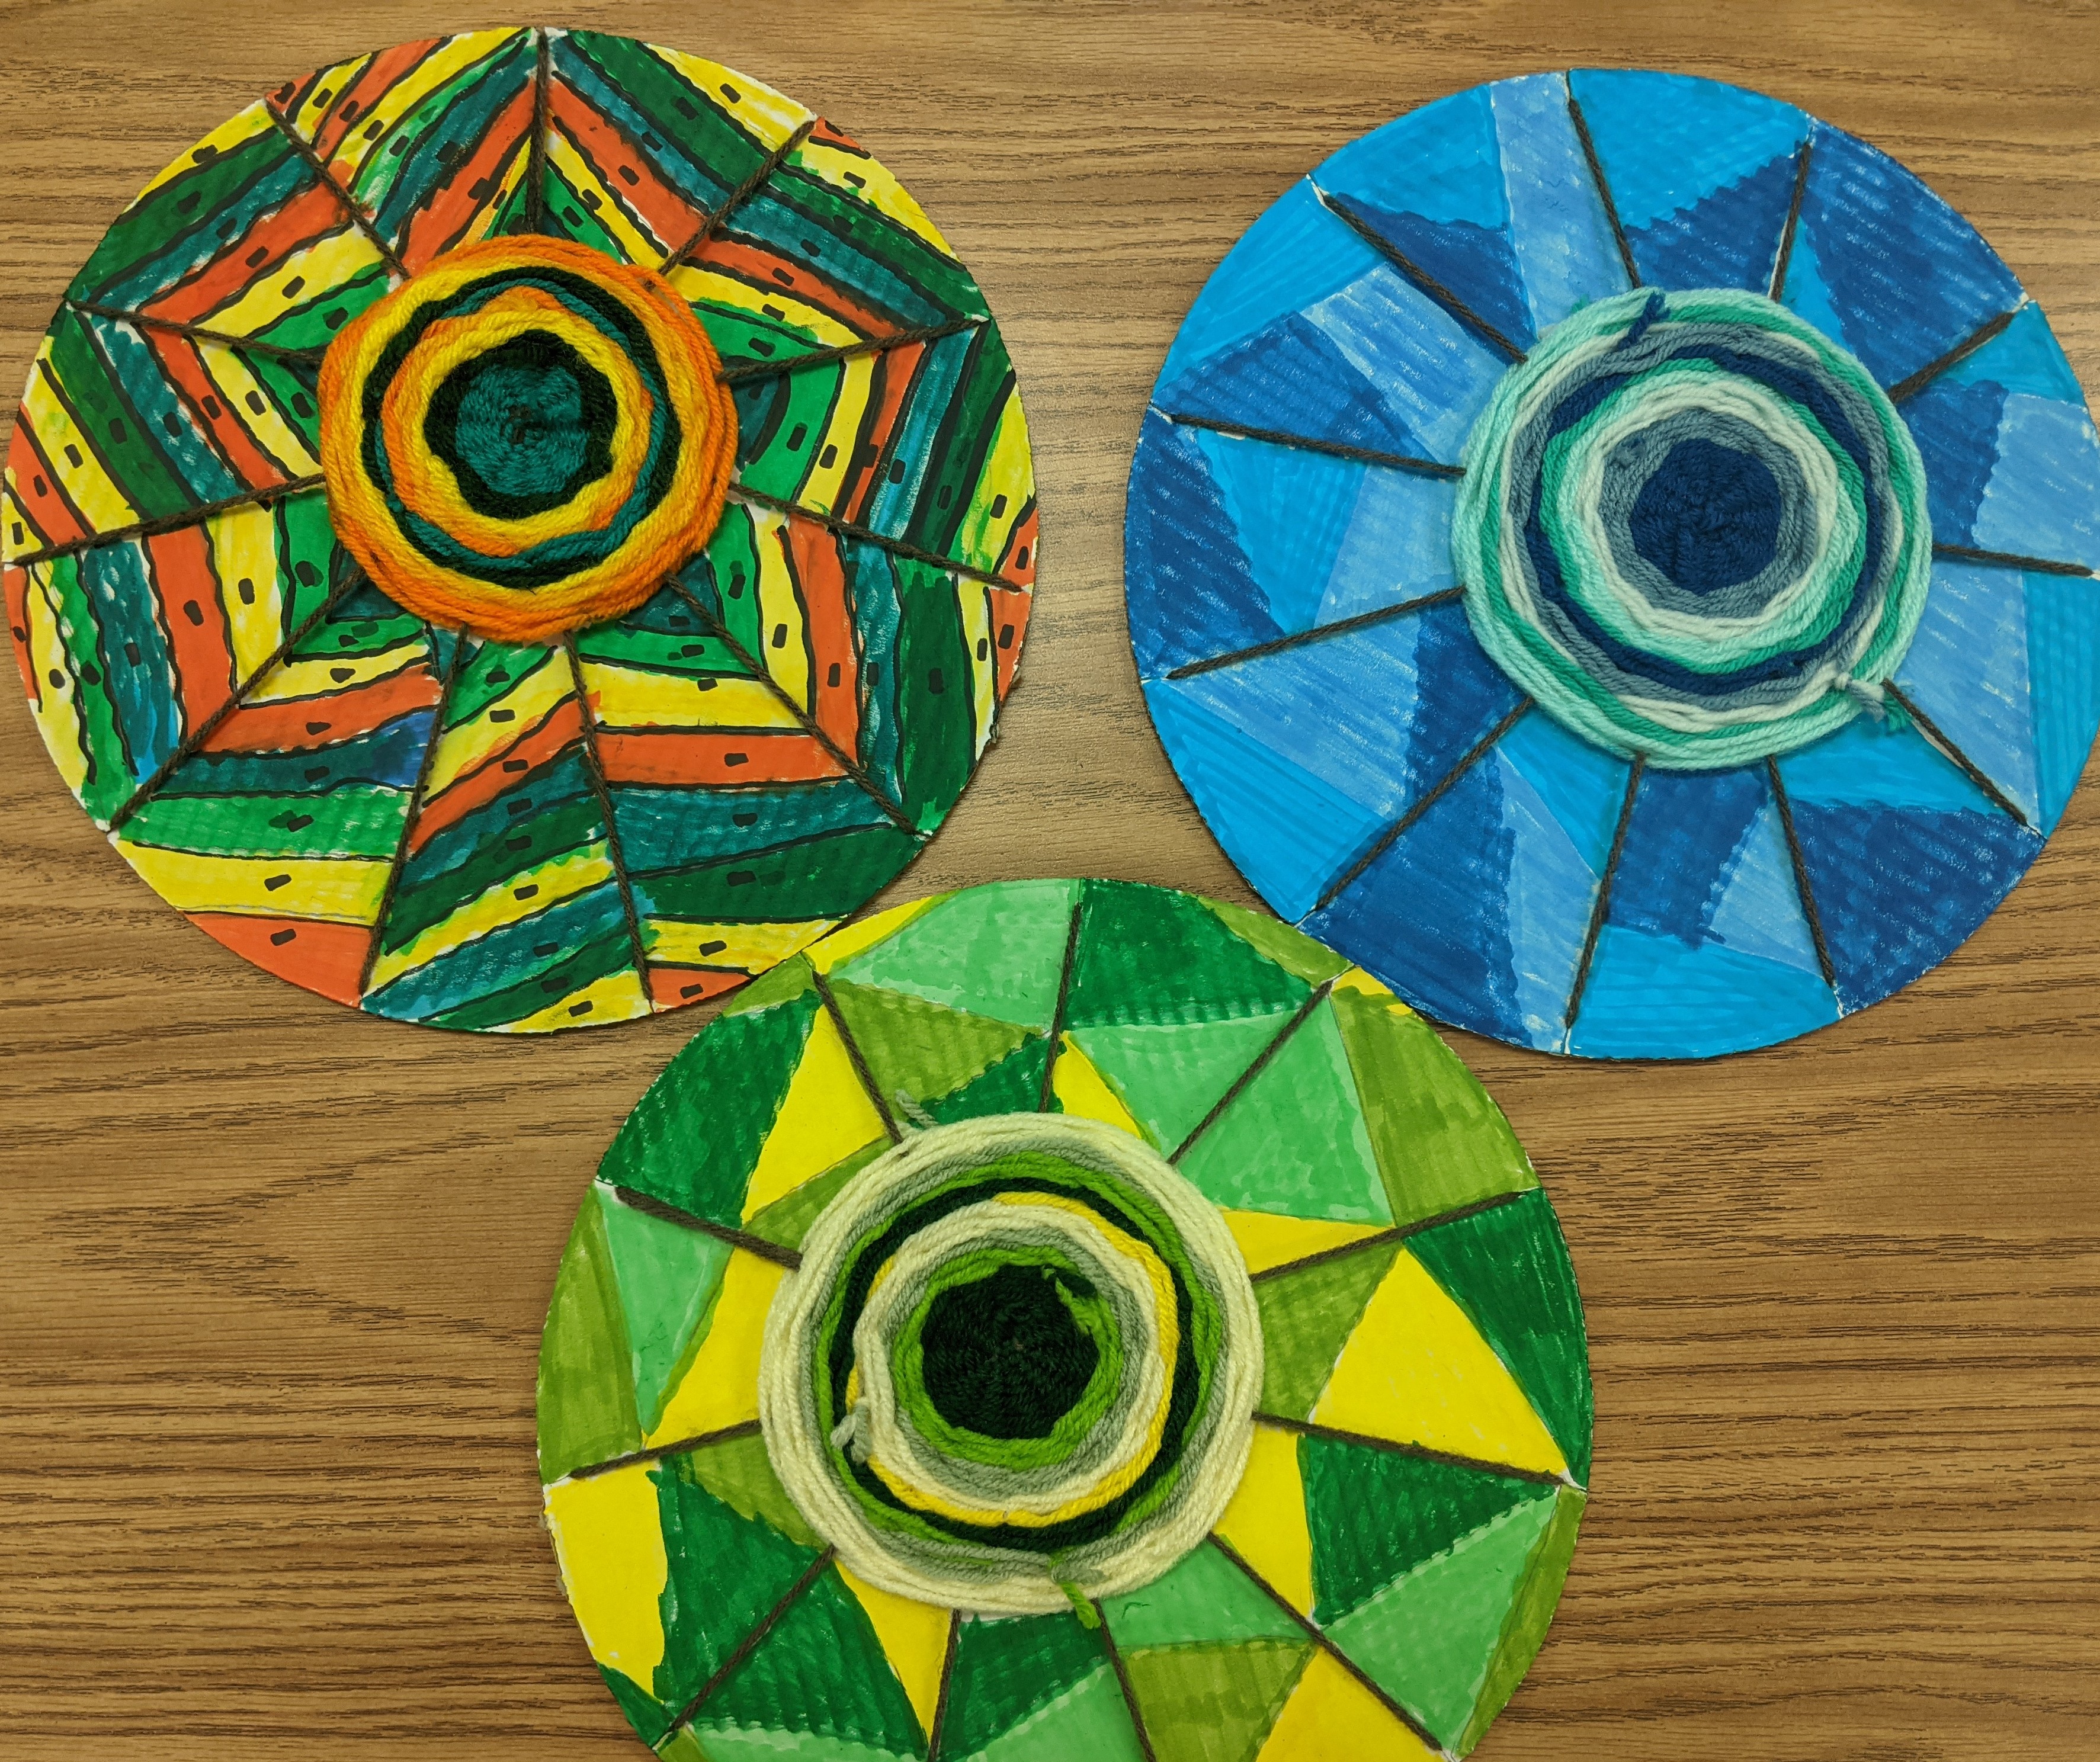
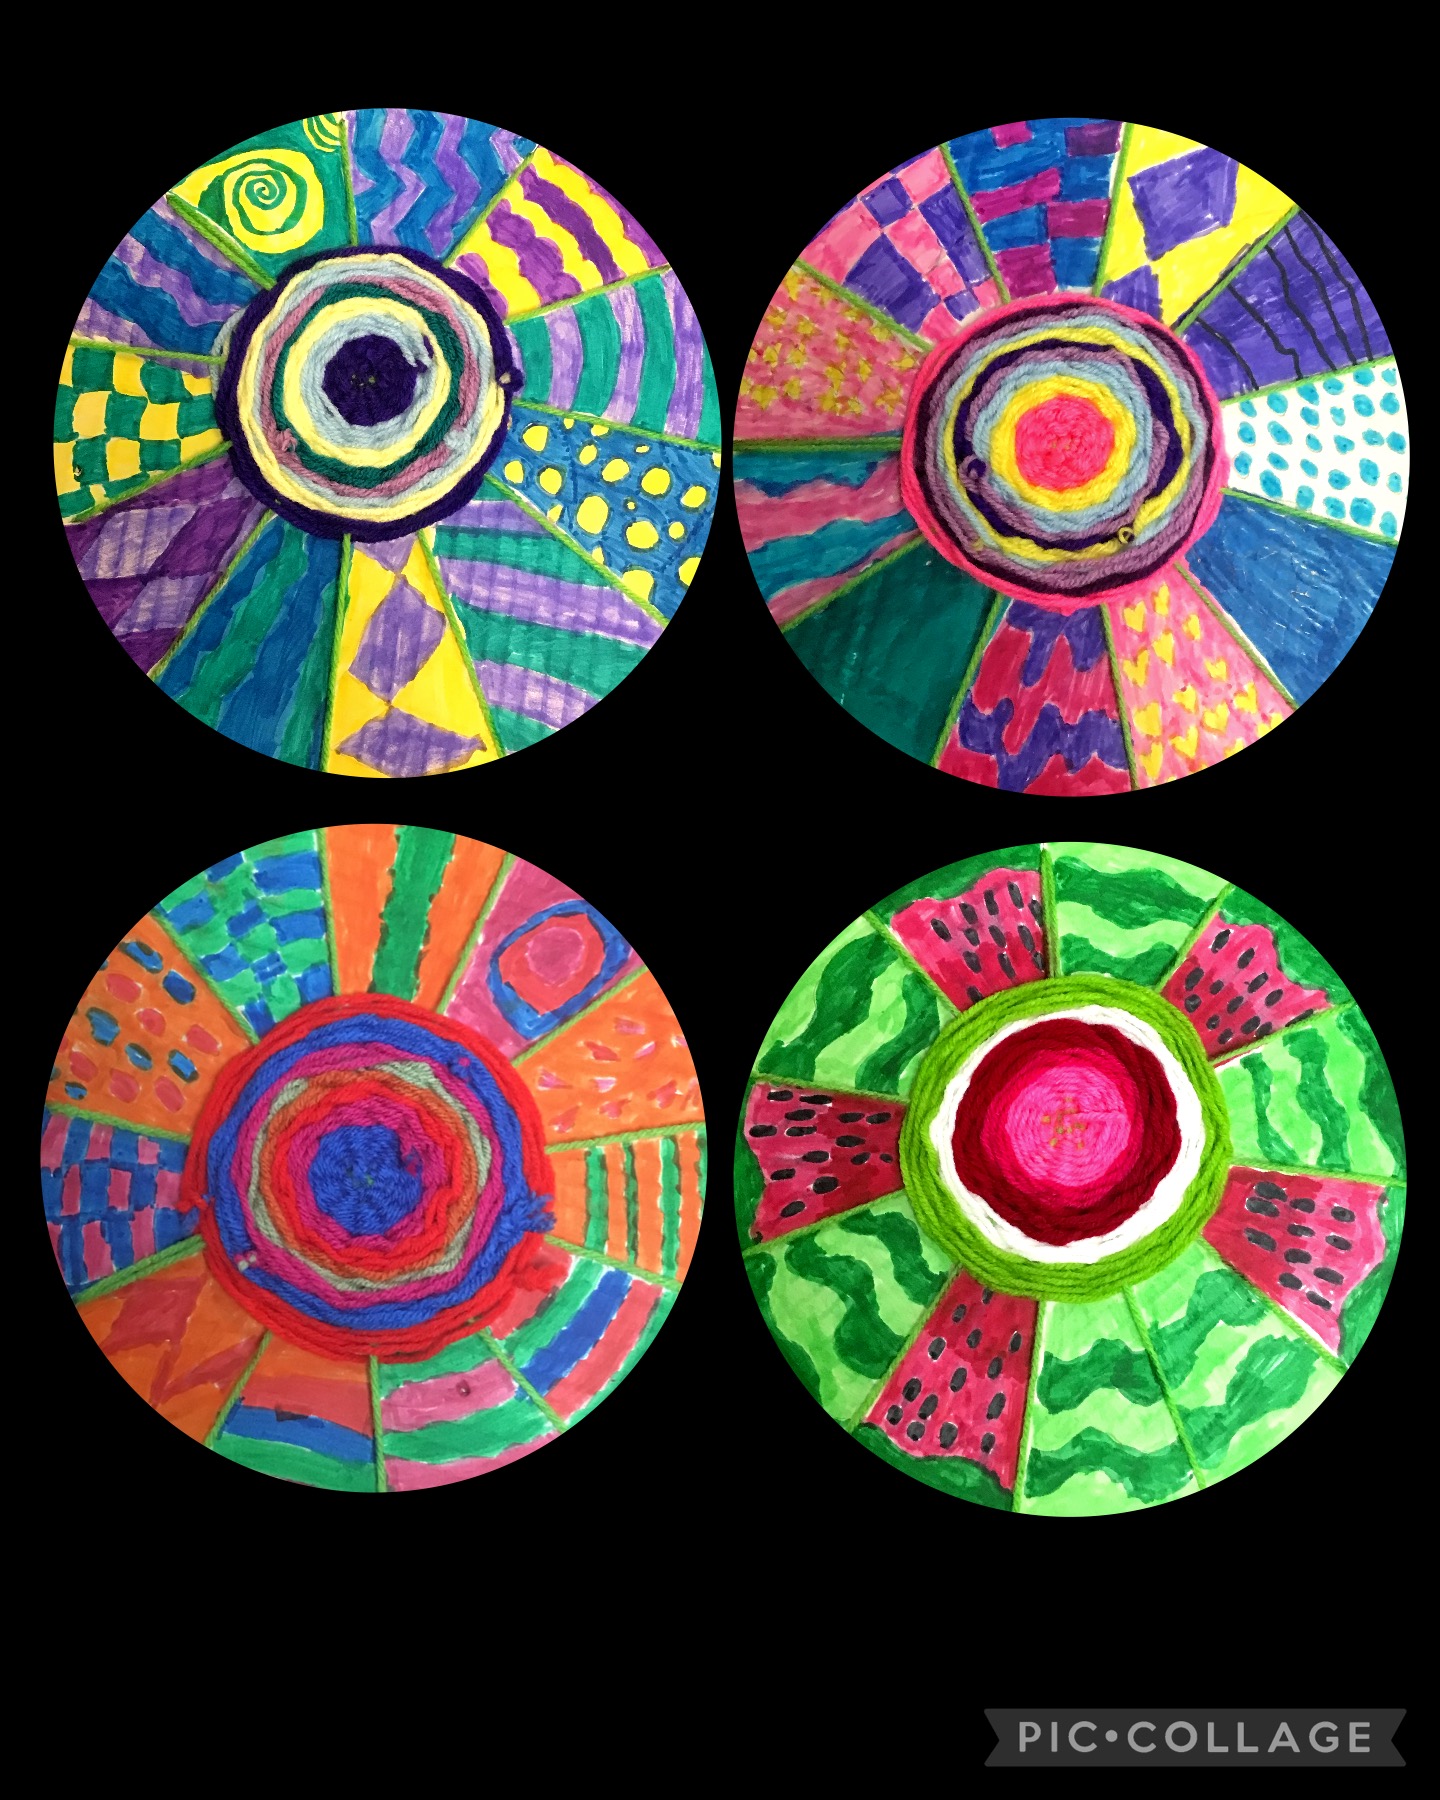
We are wrapping up weaving in 3rd & 5th grade. 3rd grade is doing circle weaving (one of my favorite projects of the year!). 5th grade is doing a tree weaving (which is a basic back & forth AB pattern, but done on a warp in a wedge shape).
When finishing circle weavings, I have my students create a pattern/design on the white surface of their loom, and color it using markers that match their yarn colors.
For the tree weavings, I had my 5th graders add beads for fruit(added as they were weaving..limit 10 beads), and then use tempera paint sticks to do a simple landscape background.
There are many ways to do these projects. These are the ways I do them, but there are wonderful variations you might want to investigate to see what is the best fit for your school/students.
We spent five class times on our weaving before moving onto new projects. However, I've opened my room up when the first bell rings at 7:45am. Students can stop in and weave for ten or so minutes in the morning before the second bell rings (I'm on the same hall as the 4th grade!). I'm averaging about 10 to 15 students each morning. I love seeing their excitement for weaving!
I’m thrilled with the circle Weavings my third graders are making! I’ve been doing this lesson for 24 years…it never gets old! I’m as excited as the kids.
I’ve you’ve not tried this lesson…you can check out my blog(search circle weaving) or my YouTube channel!
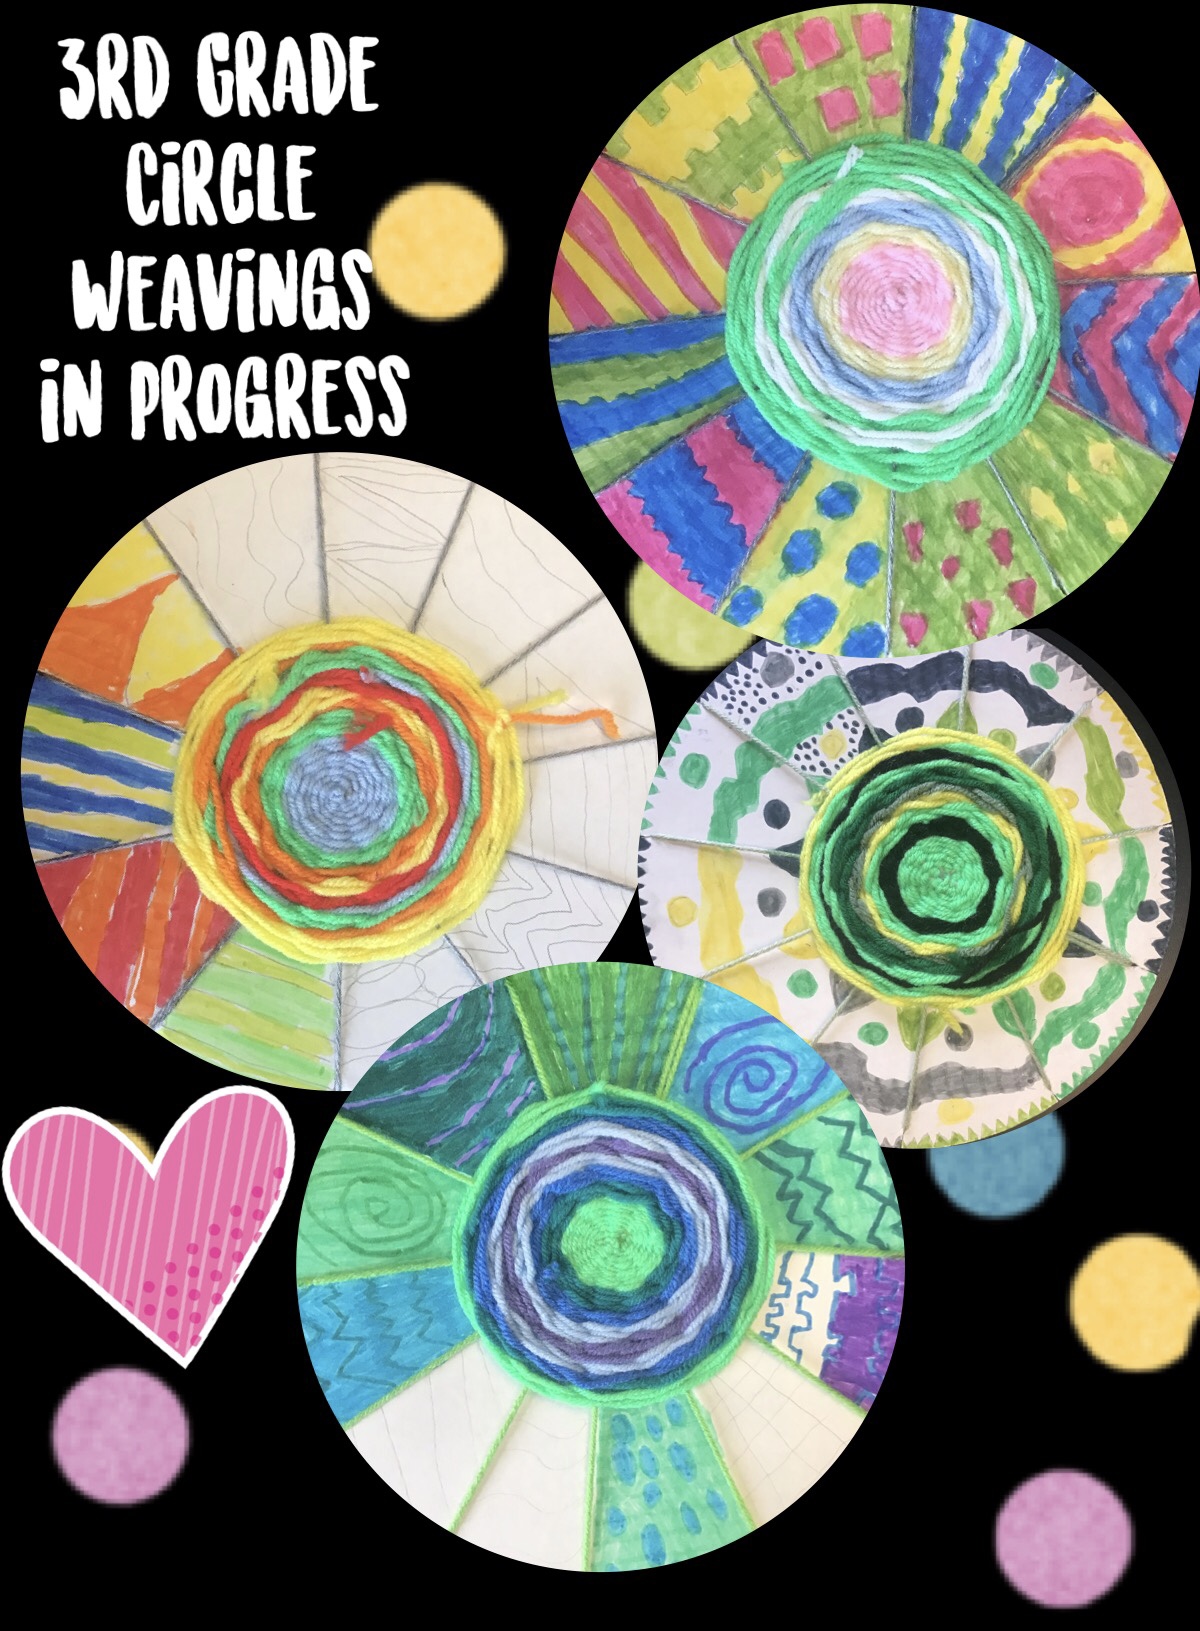
My 3rd graders are a class or two from finishing their circle weavings. Over all, this has been a pretty good year for circle weaving. A majority of my students did a great job on their work, and made few errors. I was a bit concerned. This year has been a struggle with basic direction following and focus on work (I think connected to the pandemic & online learning prior to this school year.).
Some have messaged me and asked how I handle the "yarn situation" in my room. How I do things is not THE way....it is just a way. You need to figure out what works best for you in your situation.
Many years ago I asked our "carpentry team" (I'm not sure that department exists any more?) to build me some wall shelves in two places in my room. One I keep supplies on that we use frequently and I need to be accessible to students. The other is used for storing student art(I have baskets for each class). I purchased Sterilite shoeboxes and drilled a whole in one side(using sharp "adult" scissors...be gentle when you push it in...because sometimes the boxes crack). If you are on a budget.. collect 2 liter bottles and cut the bottom off them & feed the string through the top. You can hot glue them together to stabilize them. I teach the students to go up (2 at a time) and get their yarn as needed. They pull a wing span out (finger tip to finger tip arms wide opened) and cut the yarn at the lid below the box they are pulling from. I have little issue with this...my students are respectful and do a good job(because they LOVE WEAVING!!!).
My specialty yarn...I keep it in a 10 gal plastic box. When we use the specialty yarn, I spread it out on my classroom counter top so they can see what I have available to them. Once again, two students at a time are allowed to go up to get their yarn. I have a cup with scissors next to the specialty yarn. They are allowed to select one specialty yarn that they can use up to 4 times in their weaving (I tell them it isn't special if they use it a bunch! ha ha)
Before we started with our weft string, we talked about "themes" using color that students could use in their weavings. They needed to select five "normal" yarn colors. Once they had woven the first five, they were allowed to select a specialty yarn to add to their weaving(they also could chose not to use a specialty yarn). We talked about how different yarns can cause "challenges" while weaving(pompom yarn, eyelash yarn, blanket yarn..etc). I collect specialty yarn in odd places...and only when it is on sale!!
This is our second class time working on our weavings. They hate when I say time is up!! Weaving is something that really reaches students in a way other mediums do not. We will work two or three more class times to finish these. If students don't finish...I open my classroom to them in the morning after the first bell & before the second (about 15 min). There have been days in years past where I've had 40 students in my room weaving.
In general, students have lost the ability to tie knots. Even the simple knot that most know from learning to tie their shoes(They don't really tie shoes much any more?!?). I use that one to start the radial/circle weaving. I will say...this knot I'm about to show you is a bit different(but simple). I want my students to use this knot because it is easy, strong, and cuts down on wasted yarn. I put this video on repeat for my students during the class. Yesterday...no one asked me how to do it...they just watched the video! Hope it helps you out!!
Come weave with me! Here is the being steps for how to do a circle weaving. The video will take you through the process, but I will also have written directions and pictures to help you out as much as possible. Once you get it...you won’t want to stop! Please feel free to comment or contact me if you have any questions.
SUPPLIES: paper plate or cardboard cut in a circle,
pencil, scissors, yarn, and tape
VOCABULARY: loom- the structure you weave on (the plate/cardboard in this case), warp- the string you weave through, weft- the string you weave with
On the back of your circle, make 11 marks evenly spaced around the rim, and label them 1-11. Try your best to have them an equal distance apart.
Next you will “warp” your “loom”. You will want to have just a small tail of yarn hanging on the back at the 1 spot. The majority of your yarn for the warp will be on the front of the circle. Follow the formula below to finish warping your loom.
Here is the "formula" for warping your loom!
1 to 6 (across the loom)
6 to 7(hello neighbor)
7 to 2(across the loom)
2 to 3(hello neighbor)
3 to 8(across the loom)
8 to 9(hello neighbor)
9 to 4(across the loom)
4 to 5(hello neighbor)
5 to 10(across the loom)
10 to 11(hello neighbor)
11 to 5
(the number 5 will have to strings sharing the space)
After you have warped your loom, tape down the ends on the back so they do not come out of their spots.
Feed your “weft“ string underneath the warp strings from the 3ish to the 9ish place. You want to capture all the warp strings in the middle with the smallest knot possible. Cut off the small “extra” piece of string from your knot....but be careful to not cut the knot or any warp strings.
NOW TO START THE ACTUAL WEAVING
Begin by going around the circle (I go counter clock wise..not sure why?). OVER UNDER OVER UNDER. I will go over/under about half of the stings and then pull my yarn all the way through. If you do not do this...it can get tangled up, and cause some problems for you.
At the end of each string tie the new one to the old one. You can trim the "bunny ears" off at the end. Tying knots & double(triple..or more) jumping is the biggest problem young artists have once they get started. They just have to make sure to go over or under each of the warp strings...they can not go over over..or under under.
To finish the weavings, artists can create a pattern in pencil on the rest of the plate(the background...not the back) & then use the same color of markers (as their yarn) to color their pattern.
I WILL MAKE A PART 2 TO CIRCLE WEAVING TO MAKE SURE THAT YOU ALL ARE "GETTING IT"!
The finished product can look something like this!
It has been that most wonderful time of the year....
CIRCLE WEAVING!
If you've followed me for some time you will know I love to circle weave with my 3rd graders. They love it, I love it, their work looks amazing.....it is just good stuff! I will link some previous "HOW TO" posts so you can take a look at that info if you are in need or want of it!